
Decorated Christmas Sugar Cookies With Beginner-Friendly Designs
These six decorated Christmas sugar cookie designs start with baked, cooled cookies. Try a dotted tree, a snowy star, a striped candy cane, or a blue mitten. If you only have a round cutter, you can still make a green wreath or a simple snowman face.
Start with two designs that share an icing color. The white icing on a snowy star can also add dots to a tree, and the same round cookies can become wreaths or snowmen. Below, I’ll show where to start piping and how to keep the tray looking like a set.
What You’ll Need
- Baked, fully cooled cutout cookies
- Prepared royal icing, gel colors, and piping bags
- Edible decorations labeled for food use
- A spare cookie or parchment for testing lines and dots
- Tree, star, candy cane, mitten, or round cookies
- White royal icing and two or three tinted portions
- Piping bags with small openings or round tips
- Toothpicks or a clean scribe tool
- Edible sugar accents or sprinkles, optional
- A flat tray with enough space to dry the cookies in one layer
If you want to fill a whole cookie, pipe a slightly thicker border first and add thinner icing inside it. Let one layer dry before adding a raised detail that should keep its shape. Wilton’s guide to outlining and flooding cookies explains the basic method.
1. Green Christmas Tree With White Dots
A green tree with a few white dots is easy to repeat. Keep the dots far enough apart to see the branches and place a single brighter dot near the top if you want a focal point.

- Outline the tree in green and fill the middle.
- Let the green surface set before adding the raised dots.
- Pipe white dots in a loose zigzag from top to bottom.
- Add one slightly larger dot near the top if you have room.
Leave the trunk bare on a tiny cookie. You can show the outline more clearly by ending the green icing at the bottom branch. On a wide tree, a narrow brown line is enough for the trunk.
2. Snowy Star With A Little Edible Gold Sugar
A white star gives you room to add sparkle without drawing a detailed outline. Put the edible gold-colored sugar toward one side or in the center and leave the other points quiet.

- Pipe a thin white border, keeping a narrow margin around each point.
- Fill the middle and ease the icing toward the tips.
- Add edible sugar while the surface is still wet so it can adhere.
- Leave the cookie flat to set.
If your star has narrow points, start with a smaller amount of icing and pull a little into the tips. A blob at each point can soften the shape. I like one patch of sparkle because the star still reads clearly from across the tray.
3. Candy Cane With Alternating Red And White Stripes
Wide red and white stripes make a candy cane readable with just two colors. Follow the curve of the hook and leave enough space for each band to be seen.
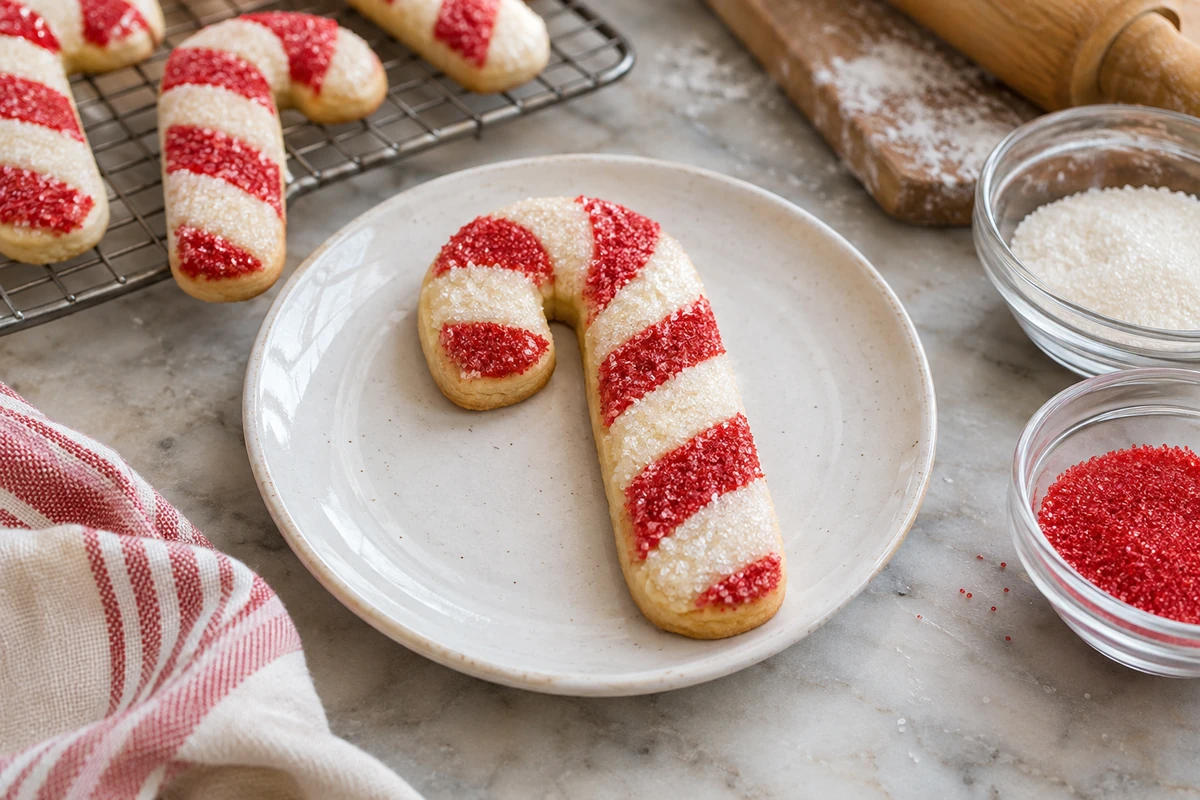
- Decide how many bands fit before you start piping.
- Pipe the white areas and let them set before adding red beside them if you want clear edges.
- Fill the remaining bands with red.
- Stop before the stripe at the end becomes too small to recognize.
For a narrow cane, leave the baked cookie visible between two or three red stripes. You still get the pattern with less piping and fewer places where colors can run together. Try that version first if the hook is tight.
4. Blue Mitten With A White Knitted Pattern
A blue mitten with short white stitches has a winter look that sits well beside bright red and green cookies. Give the thumb a clear outline and keep the stitch pattern mostly on the wider part of the mitten.
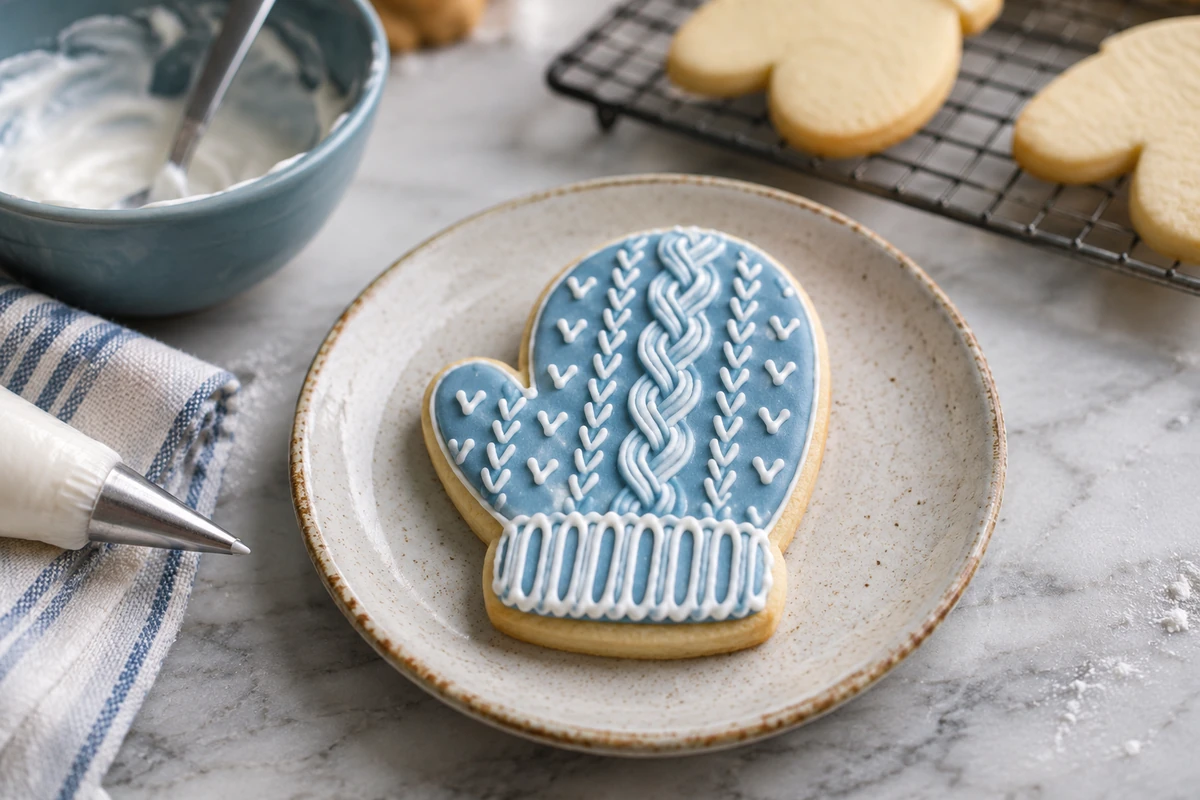
- Outline and fill the mitten in blue.
- Let the base set so the stitches will stay raised.
- Pipe a short white band near the cuff.
- Add a few small V-shaped stitches above it.
If a V feels awkward, use pairs of short diagonal lines. Two rows are enough on a small mitten. Keep the design away from the narrow thumb so its shape stays easy to see.
5. Green Wreath On A Round Cookie
A wreath design works on a round cookie without a hole in the middle. Pipe a circle of green dots or short strokes and leave the center bare.
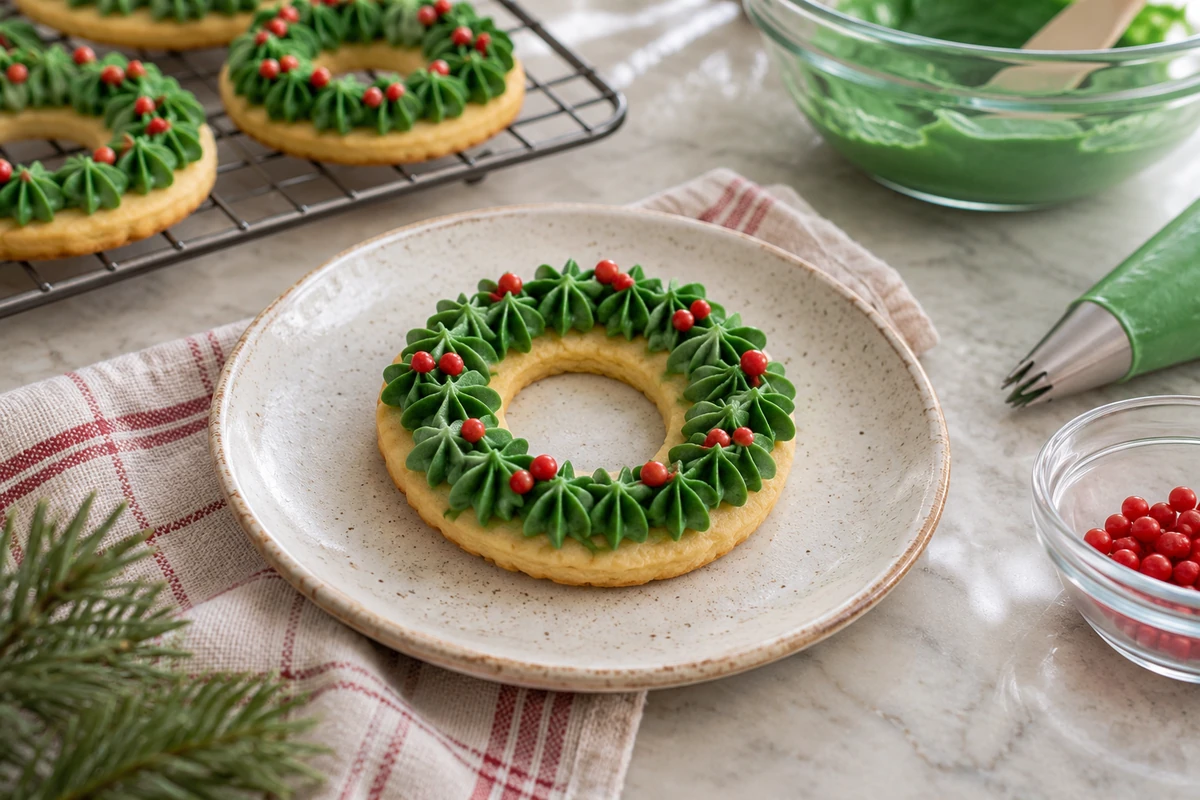
- Mark the top, bottom, and sides with four small green dots.
- Fill the gaps with more dots to form a ring.
- Add a few tiny red dots where you want berries.
- Leave the center open, or pipe a short bow at the bottom if there’s space.
Put the berries on only two sides. A few dots give the green ring some color and keep it looking loose. For a round cookie with an uneven edge, use the widest part of the cookie as your guide and let the ring sit a little inside it.
6. Snowman Face With A Small Orange Nose
A snowman face turns an ordinary round cookie into a holiday design with three colors. Set the eyes a little above the center and leave room for a short carrot nose.

- Outline and fill the circle with white icing.
- Let the white surface set before adding the face.
- Pipe two dark dots for eyes and a short orange stroke for the nose.
- Use three or four small dark dots to suggest a smile.
Keep the first face simple. If you want a scarf, add one short colored line near the bottom. Try that on a wider cookie so the face and scarf have enough space to read separately.
How To Build A Cookie Tray That Looks Like A Set
Choose two main icing colors and carry one across several shapes. White can connect a snowy star, blue mitten, and snowman. Green can carry a tree and wreath.
Give one design the most detail and let the other shapes fill quieter spaces on the tray.
The easiest Christmas sugar cookies to decorate are shapes you can finish with one base color and a few small details. Try white stars with edible sugar, green trees with dots, or round cookies with snowman faces. Use a spare cookie to check your piping before repeating the design.
For a tray made in one sitting, choose a design with fewer waiting stages. A white star with sugar can be finished while the icing is wet. A mitten with raised white stitches takes longer because the base needs time to set.
If you’re making the cutouts yourself, start with this Christmas sugar cookie recipe. For consistency tests and help with flooding, see the Christmas cookie decorating guide.
Frequently Asked Questions
Choose simple shapes and use one spare cookie to practice the details. These answers cover which designs are easiest to start with and when the finished cookies are ready to pack.
What’s the easiest Christmas cookie design for beginners?
Try a wreath on a round cookie. A loose ring of green dots and a few red accents give you a recognizable design with very little outlining. A snowy star with edible sugar is another easy choice.
Can I decorate Christmas sugar cookies without many cutters?
Yes. Round cookies work for wreaths and snowman faces, and a single star cutter gives you several ways to use color or sugar. Repeat one design if you want a tray that looks consistent.
How can I keep red and white icing from mixing?
Let the first color set before piping beside it, and test the combination on a spare cookie. Keep the icing inside its border and avoid pooling a large amount of red next to the white.
When can I put decorated cookies into a tin?
Wait until the icing is fully dry. For royal icing, Wilton recommends allowing at least eight hours and preferably overnight for a flooded cookie. Use a spare cookie to check the finish before you stack the batch.
Final Thoughts
Make the decorated Christmas sugar cookies you can repeat comfortably. One tray of green trees and snowy stars can feel finished with two bags of icing and a little edible sugar. A spare cookie gives you room to test the dots or adjust the color before working on the ones you’ll serve.
Leave space between the shapes while they dry, and choose a shallow box if you want the details to stay visible. If you have only one cutter, try two versions of the same shape. A wreath and a snowman can share a tray without looking alike.





3 Comments