
Christmas Cookie Decorating Tips, Icing Tools And Setup
Christmas cookie decorating is easier when the cookies are cool, the icing is tested, and you have a clear place for each finished cookie. Start with one plain cookie so you can see how the outline and flood behave together before filling a whole tray.
I’ll walk through testing royal icing, arranging the tools, outlining and flooding, fixing bubbles and gaps, and drying the cookies flat. If you’re new to piping, start with one color. You can use the same test to check each new color or consistency as you work.
Use Wilton’s meringue powder royal icingAs the starting recipe.
1. Test The Icing Before Filling A Bag
Use medium royal icing for an outline that keeps its shape and thinner icing to cover the middle. A small test line tells you more than the appearance of the icing in a full bowl.

For Christmas cookie decorating, outline icing should hold a raised line, while flood icing should relax enough to cover the cookie without spilling over that line. Test both on a spare cookie. Wilton uses a ten-count ribbon test as a starting point for flood icing.
- Prepare the base icing according to the recipe and divide it into small bowls.
- Reserve some for outlining before thinning the rest.
- Add water to the flood portion a little at a time and stir gently.
- Lift a spoonful and let a ribbon fall back into the bowl. Watch whether it merges with the surface by about a count of ten.
- Check a little on a spare cookie before filling a bag.
Test after tinting, especially if you added more than a little color. Keep the bowl covered while you work. If the flood icing runs over the edge of the test cookie, use less at a time and check whether the batch needs some of the thicker reserved icing mixed back in.
2. Set Out The Tools In The Order You’ll Use Them
Make a small station with cooled cookies on one side, icing in front of you, and a flat drying tray on the other side. The next cookie should be easy to pick up without reaching across fresh icing.
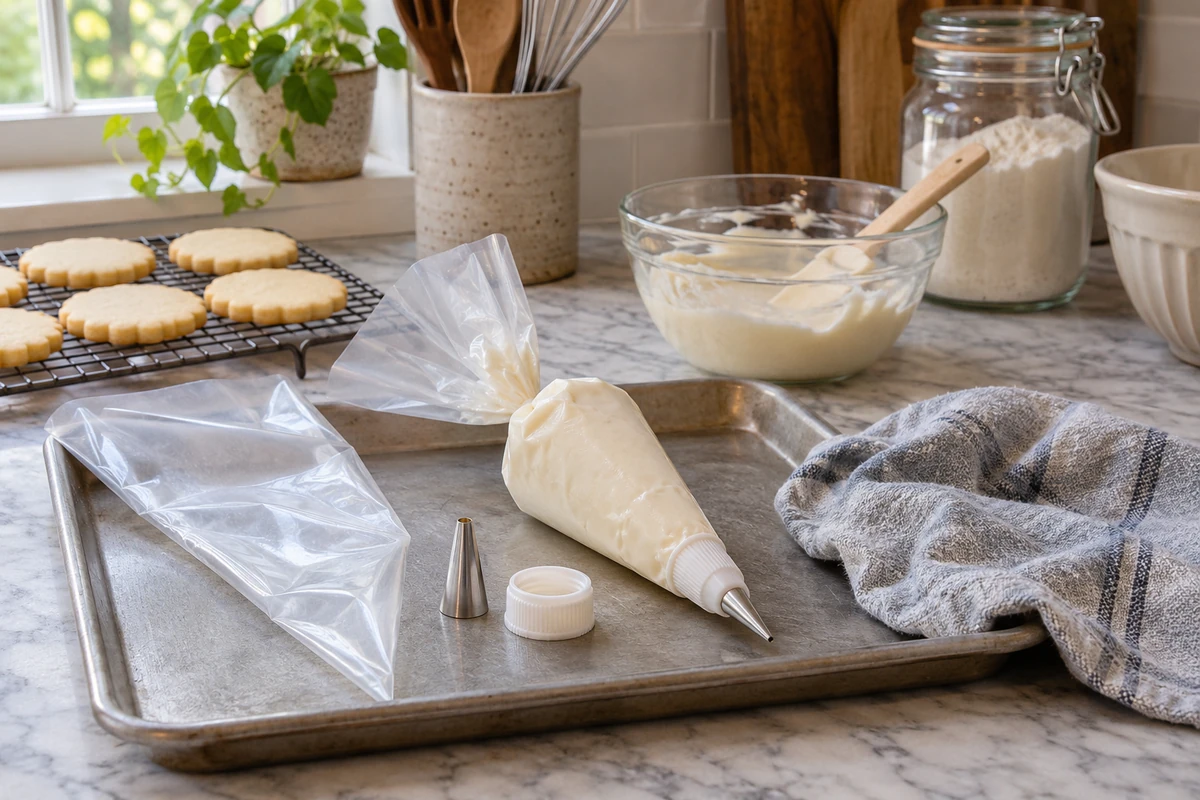
- A small round tip or trimmed piping bag for outlines
- A separate bag for thinner flood icing
- Clean, grease-free bowls and spatulas
- A toothpick or scribe tool for spreading icing and popping bubbles
- A damp cloth to protect idle tips from drying
- A level tray with room between cookies
Label the bags if you use two consistencies in the same color. Fill them only far enough to hold comfortably in one hand. Twist the open end and keep it above your grip, then squeeze from the top so you can stop the flow cleanly.
Keep the drying tray away from the main work area. A flat cookie is easier to move before you decorate it. Once it’s flooded, lift it carefully by the bare edge or decorate directly on the tray if you have room.
3. Outline And Flood One Cookie First
Pipe a border slightly inside the baked edge, then fill the space within it with thinner icing. Think of the border as a small dam. Check that it’s continuous before adding the flood.

- Touch the tip down where you want the line to begin, squeeze, and lift slightly.
- Follow the shape with even pressure, stopping at a corner if you need to turn the cookie.
- Close any gap in the outline and let it set enough to hold the fill.
- Add flood icing inside the border, working in one area at a time.
- Use a toothpick to ease wet icing into any bare spot near the edge.
Start with a round cookie before outlining narrow shapes. A round edge helps you learn how the icing falls when you lift the tip. For a pointed star, stop squeezing just before the end of a point and use a toothpick to bring the wet icing into the tip.
4. Fix Bubbles, Gaps, And Uneven Lines While You Can
A visible bubble or a tiny bare patch is easier to fix while the icing is still wet. Keep the tool nearby and make the smallest adjustment you can.

- Small bubbles: Pop them with the clean point of a toothpick or scribe while the flood can still settle.
- Bare spots: Nudge nearby wet icing into the gap. Add a little more only if the surrounding area has room for it.
- Flood spills: Check for a gap in the outline and use less flood on the next cookie. Retest the icing if it keeps running.
- A wavy border: Practice a short line on parchment and try lifting the tip a little rather than dragging it along the cookie.
- Icing crusts in the tip: Wipe away dried icing and cover the tip when you pause.
Vigorous mixing can introduce air. Wilton recommends letting the mixed icing sit to give bubbles time to rise, then stirring gently. Do that before refilling a bag if several cookies in a row develop the same problem.
5. Dry The Cookies Flat Before Packing
Leave flooded cookies on a level tray with space between them. Wilton recommends at least eight hours and preferably overnight for fully flooded cookies to dry. Humid conditions can take longer.
Plan around the drying time before deciding how many batches to decorate.

To tell whether royal icing cookies are ready to pack, allow time for the icing to dry, then check a spare cookie from the same batch. The surface should feel firm and leave no mark with a very light touch. Give thicker areas more time if the test cookie still feels soft.
If you plan to add raised details, let the base set first, add the detail, and give the finished cookie time to dry again. Keep the most delicate designs in a shallow layer and use parchment between layers only after the icing has hardened.
Follow the icing recipe’s storage guidance for any leftovers.
For patterns to pipe on your first tray, try these decorated Christmas sugar cookie designs. Once the icing is dry, use these ideas for Christmas cookie gift boxes to choose a shallow box or a tin.
Frequently Asked Questions
For a first tray, test both icing consistencies on a spare cookie. The answers below cover what to adjust if the icing runs, the outline looks too wide, or the surface dents.
Why does my flood icing run off the cookie?
The icing may be too thin, there may be a break in the outline, or the cookie may have too much icing on it. Check one cause at a time on a spare cookie. Start with less flood and look for a continuous border.
What’s the difference between outline and flood consistency?
Outline icing holds a defined line when piped. Flood icing is thinner and levels out inside the border. Keep some of the thicker icing in reserve so you can adjust a portion that became too thin.
Can I use a piping bag without a metal tip?
Yes. Trim a very small opening and test it on parchment. You can always make the opening larger, so start small, especially if you want a narrow outline.
Can I use raw egg whites in this recipe?
Follow the linked meringue powder formula and use the ingredient it specifies. Wilton advises against substituting raw egg whites in that recipe. If you prefer another icing, choose a tested formula and follow its ingredient and storage directions.
Why does my icing look dry on top but still dent?
The top can set before the deeper layer hardens. Let the tray sit longer, particularly if you flooded thickly or the room is humid. Test a spare cookie before stacking or wrapping the others.
Final Thoughts
Keep the Christmas cookie decorating station small enough that you can reach the next cookie without crossing a wet tray. Use the first test cookie to make changes to the icing or the opening in the bag.
Once the test looks right, the rest of the batch is easier to work through.
Leave a space for the drying tray before you start and give it the time your icing recipe calls for. If you’re planning to give the cookies away, choose a box that leaves room above the icing. Make the packaging decision before piping anything tall.






One Comment